728x90
ETS를 이용해서 device의 group address가 전부 설정된 이후 read/write 하는 것이 목표
1. knx 객체 정의
from xknx import XKNX
from xknx.io import ConnectionConfig, ConnectionType

aysnc def main():
    xknx = XKNX(

        connection_config=ConnectionConfig(

            gateway_ip="knx net/ip address",

            gateway_port=3671,

            connection_type=ConnectionType.ROUTING,

        ),
)- router를 사용하는 경우(EX. ABB ips)
ConnectionType을 Routing으로, TUNNELING도 설정 가능 - device들이 이 객체 하위로 묶인다.
- 비동기 처리 필수
2. device 정의
- xknx가 지원하는 디바이스 목록은 (https://xknx.io/devices) 참고.
- 지원하지 않는 디바이스도 return value 등에 따라서
Sensor,Binary Sensor,Climate등으로 사용 가능할 수도 있을 수도 있음async with xknx: temperature = Climate(xknx, "temp value", group_address_temperature="0/0/8") humidity = Sensor( xknx, "humidity value", group_address_state="0/0/11", sync_state=True, value_type="percent", ) - 각 디바이스 객체마다 필수로 지정해줘야하는 값이 있으므로 코드를 잘 읽어보고 설정할 것.
3. value 읽기
        await temperature.sync(wait_for_result=True)
print("- Temperature: ", temperature.temperature.value)device.sync로group_address에 있는 값을 읽어옴- device에 따라 값이 들어가있는 위치가 다름
- ex) climate 온도 -> device.temperature.value
- ex) Sensor -> device.sensor_value.value
- ex) Binary Sensor -> device.remote_value.value
- ex) Switch -> device.state
4. value 쓰기(on/off)
- on/off 제어가 아닌 경우
set_target_temperature과 같이 값으로 설정할 수 있는 것으로 보임. - 그러나 해보지 않았으므로 다루지는 않겠음... 돌려놓을 자신이 없어서 실험 안 함 하하
heating = Switch(xknx, "heating", group_address="0/0/6") onoff = int(input()) if onoff == 1: await heating.set_on() else: await heating.set_off() - Switch와 Light 객체 모두
set_on()과set_off()함수로 끄고 킬 수 있음
5. asyncio.gather를 사용한 동시 실행
    async def sync_value(device):
        await device.sync(wait_for_result=True)
        print(f"{device.name}: Value = {device.temperature.value if device.name=='temp value' else device.sensor_value.value}")
    await xknx.start()
    await gather(*[sync_value(device) for device in devices])
    await xknx.stop()
async with xknx를 쓰고 싶지 않다면xknx.start를 해놓고 아래에 동작시킨 뒤에xknx.stop해줘도 됨- 다만 SIGINT 발생 전까지 멈추지 않음
- OPC 처럼 List 형태로 한 번의 통신으로 보내고 한 번의 통신으로 받아오도록 할 수 없음
- 각각의 device가 모두 고유 주소를 가지고 있기 때문에
6. 상태 변화 시 알림
- xknx 선언 시에
device_update_cb에 콜백 함수를 설정해주면 xknx 객체 아래에 달린 device의 상태변화가 있을 시에 알려줌 - windows platform이 아니라면
daemon_mode=True옵션을 활성화해주면 됨 - 아닌 경우에는
xknx.start() - xknx.stop()을 활용
import asyncio
from xknx import XKNX
from xknx.devices import Climate, Sensor, BinarySensor
from xknx.io import ConnectionConfig, ConnectionType

async def device_updated_cb(device):
    print(f"Callback received from {device.name}")
    if device.name == "heating fb":
        value = device.remote_value.value
    elif device.name == "temp value":
        value = device.temperature.value
    else:
        value = device.sensor_value.value
    print(f"+ {device.name} State Changed: ", value)

async def main():

    xknx = XKNX(
        connection_config=ConnectionConfig(
            gateway_ip="knx net ip address",
            gateway_port=3671,
            connection_type=ConnectionType.ROUTING,
        ),
        device_updated_cb=device_updated_cb,

        # daemon_mode=True, # not supported on win32 platform

    )
    async with xknx:
        heating_state = BinarySensor(xknx, "heating fb", group_address_state="0/0/7")
        await heating_state.sync(wait_for_result=True)
        print("- Heating State: ", heating_state.remote_value.value)

        temperature = Climate(xknx, "temp value", group_address_temperature="0/0/8")
        await temperature.sync(wait_for_result=True)
        print("- Temperature: ", temperature.temperature.value)

        await xknx.start()
        # Wait until Ctrl-C was pressed
await xknx.stop()- 위와 같이 등록해두고 on/off가 가능한 디바이스를 껐다 켰다 하면
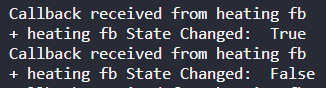
- 이렇게 잘 나온다
728x90
'🌠 etc.' 카테고리의 다른 글
| [Linux/CUDA] Ubuntu 24.04 LTS에 CUDA 및 Tensorflow GPU 설치하기 (0) | 2025.01.15 |
|---|---|
| [Obsidian] 플러그인_추천_및_10개월_사용후기.md (4) | 2024.08.05 |
| [Protocol] KNX Overview (1) | 2023.12.15 |
| [Obsidian] 커뮤니티 플러그인 추천 및 Git을 활용한 연동법 (0) | 2023.10.20 |
| [Obsidian] Notion vs Obsidian, 내가 Obsidian으로 이사한 이유 (3) | 2023.10.19 |